
I've had trouble making fiberglass molds of my 29mm nosecone plug. They're not terrible, but it took a couple of tries to get usable ones, and they have quite a few flaws from bubbles and a ragged partline. So I'm trying something new for me, a silicone mold:
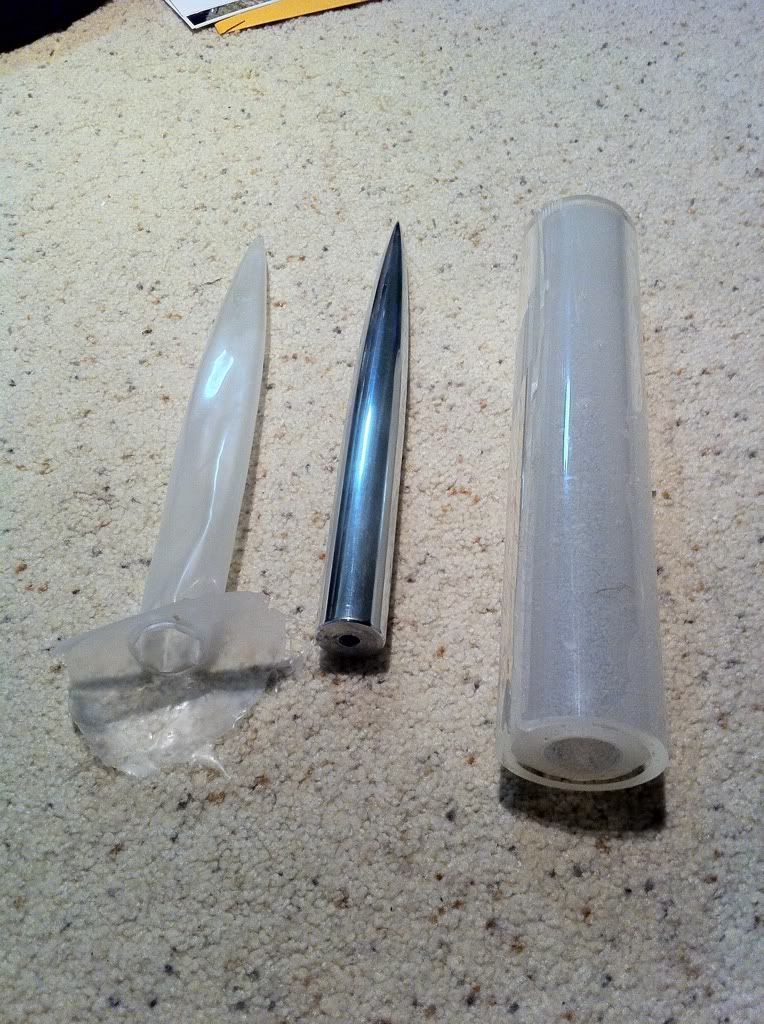
Once again, Ed got me started on the idea. I bought a section of acrylic thick-walled tube from McMaster, and some "sorta-clear" silicone from smooth-on.com. The idea was to make a transparent mold so that I could see the layup from the outside. The silicone for the mold was more viscous that I bargained for, though, so there were a ton of bubbles that didn't come out, and my vacuum pump doesn't suck enough to effectively de-gas it before pouring. I may try again later with pre-warming it to reduce the viscosity, or maybe try some silicone thinner additive. It looks like none of the bubbles are on the inside surface of the mold, but I can't tell for sure yet.
But in the meantime, I have a silicone mold that I was able to remove from the acrylic tube after making one lengthwise slice down the tube after it cured. The silicone has self-release properties, so you don't have to worry about mold release agents with epoxy, and it's just flexible enough that I think I'll be able to pull the part out of the mold afterward without having to slice into it. We'll see.
My other problem has been getting the layup pressed against the mold surface. Normally this would only be somewhat challenging, but for this really skinny, 29mm cone, it's a major challenge. Silicone to the rescue again, maybe. I made the critical part of the vacuum bag by painting a couple of thin layers of silicone on the plug, and then turning it inside-out after it cured. I'll use the resulting silicone ...um, what else to call it except a condom... to press the layup against the inside of the mold after sealing it to the rest of the bag
For the layup I'm just going to use a single layer carbon fiber sleeve, which I have found conforms well to the compound curves of the nosecone. It won't make it all the way to the tip, but that's o.k. because after it cures I'll cast tungsten-epoxy into the tip for noseweight. I'll try laying up the part tonight. Wish me luck.
By the way, the nice aluminum nosecone plug was courtesy of Larry Haynes and his machine shop about a year ago.
My last nosecone attempt was mostly a failure. I had too much of the carbon sleeve in the mold, so it bunched up and wrinkled, making a couple of deep divots. I thought the vacuum bag would push it down, but the vacuum pressure only really reached the outer few inches, since I only had the bare vacuum bag going down into the mold.
The good news is that the mold only has one small flaw on its surface, and I was able to get the part out of the mold without much trouble. The vacuum bag on the inside also released without tearing, so I'll be able to re-use it again. The mass of this last part came out to 23 grams, not including the front 2" or so that I would cast in later, and the single sleeve of carbon is plenty strong.
I think for my next attempt I will try the one-piece sleeve again, but not attempt to have it go down quite so far to the tip. Also, I'll work harder at getting it to lay flat before bagging it, and I'll see if I can put a couple of strips of peel ply & breather down the length of the cone to get a better vacuum. I'm pretty sure it would be impossible for me to have continuous peel ply stuck all the way around down the whole length, but perhaps I can make some strips work to provide a path for the air to get out. I'll try tacking some paper towels onto narrow triangular strips of peel ply, so that I can just stick those down into the mold before I put the vacuum bag in. I also ordered some 1" and 0.75" diameter carbon sleeves in case I decide later to do the cone in sections. For small projects like this, the cost of the carbon fiber is pretty trivial, less than $3 per cone.
My second attempt (bottom) came out much better than the first one (top):
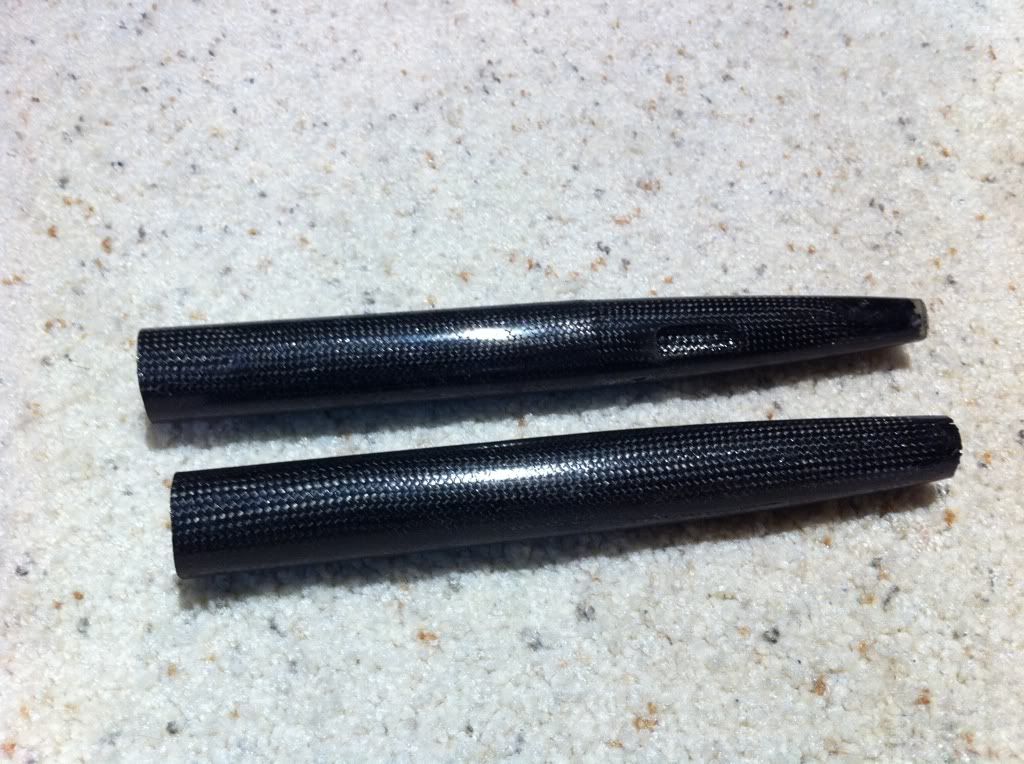
I need to get it back into the mold and cast the noseweight into place, which will complete the tip. While I'm at it, I'll add coat the outside with epoxy to try to fill in the print-through that was pretty significant on this one. The nosecone right now is nice and strong, and weighs 13 grams. I'll add about 150 grams of weight to the front end.
Here it is with the epoxy/tungsten powder cast into the tip of the nose. Yes, the rocket is balanced on that cup.
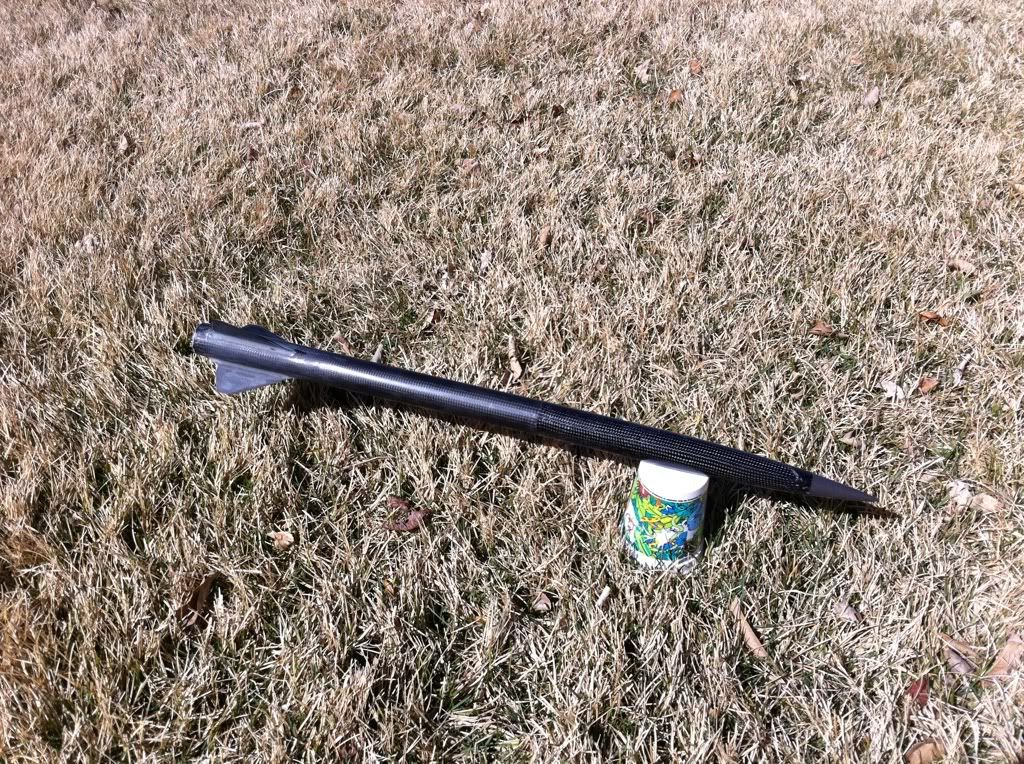
The extra coating of epoxy on the outside came out uneven, so I sanded most of it off and I'm thinking about trying to re-cast the outer coating again in the mold now that the tip is there and the extra epoxy won't be able to seep down the the bottom.
I'm impressed. I've molded a fair number of things - a motorcycle fender from carbon fiber for a buddy, a part for another guys' motoglider kit that he damaged, a replacement piece for a carbon-fiber laptop shell (really proud of that one)... but I've never been successful with nosecones.
I really like the tungsten - few even think that is is much denser than lead. (1.7 times if I recall HS chemistry) Fewer still would make the effort to get it.
Looking at this bird reminds me of my G-record bird - the balance point is very similar. I guess I should dig that out and see if I can find another altimeter that will fit the 24mm airframe and fly it. I know it'll best JW's old G-record - it came within 150' of taking John's old F record with 1/2 the motor... and I still have an SU F32 if I want to fly it on a full F. That doesn't even address then 1/2 dozen G55's I have in the magazine.
These days, tungsten powder is pretty easy to come by, because apparently golf club makers use it. You can buy 1/2 lb it from Amazon for $20. For me it would be a little pricey for noseweight on a really large bird, but it's tolerable for a 29mm rocket.
If you still have your Parrot, that would work. A Raven fits into a 24mm airframe, too. In fact, that's one size of the av-bays I'm selling now.
This rocket is designed for H impulse. Looks like it might be a little dicey for breaking the waiver at Hartsel, so I'll probably try it at NCR first to measure the Cd.
Very nice Adrian. You should try spincasting them. I'm sure a chopped carbon fiber layup would be as strong and smooth. Tungsten is used to weight golf club heads - you know, the new space ship flying saucer drivers.
Edward
Nice work Adrian, looks real nice. What is the overall weight? how much weight did you had?
Very nice Adrian. You should try spincasting them. I'm sure a chopped carbon fiber layup would be as strong and smooth. Tungsten is used to weight golf club heads - you know, the new space ship flying saucer drivers.
Edward
Too bad I don't have a lathe, or I'd try it. I don't think my mold is centered well enough either, but I could make another one. Do you really think chopped CF would be as strong? I kept blowing holes in the last 29mm nosecone I made for LDRS last year because the ejection charge has to be so close.
I pulled the re-molded nosecone out of the mold this morning, and I'm really happy with how it came out. I had only a couple small bubbles, and the rest is polished smooth. No mold seam marks, since there aren't any mold seams. Yesterday when I was handling the cone, it slipped and I broke off the tip of the epoxy/tungsten, so now the very tip is just cast epoxy:
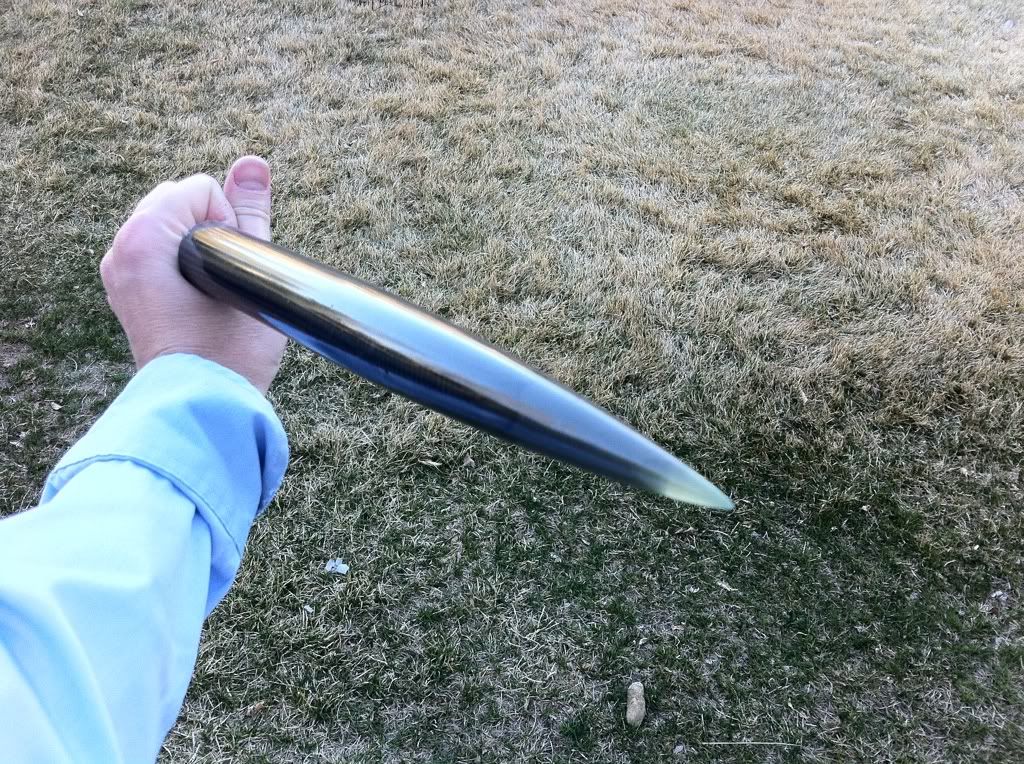
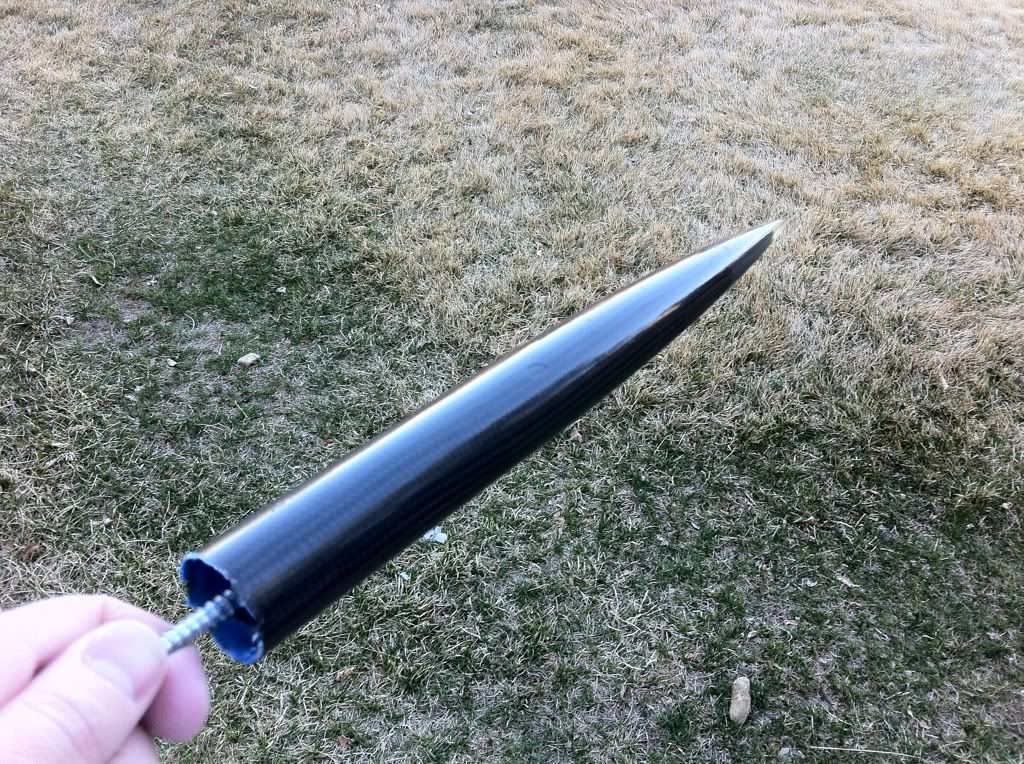
The only problem is that the spent F10 casing I stuck in there (after masking to prevent any epoxy leaking in, in theory) is glued to the inside. The casing broke in half when I was trying to get it out this morning, so I'm probably going to have to cut it out. The screw you see is a bolt I screwed into the F10 nozzle to help pull it out. I'll try that tonight.
This is definitely the best nosecone quality I have gotten from a mold so far. I'm going to use it for an H flight this spring, and probably for a sustainer for my 40kft LDRS shot.
Nice work Adrian, looks real nice. What is the overall weight? how much weight did you had?
The cured carbon fiber was 13 grams, before I added the epoxy to the outside and tungsten/epoxy to the tip. Then it was 170 grams after casting the tungsten and after I sanded most of the outer epoxy off. I haven't weighed it yet with its final gloss coating and broken/repaired tip, but I will once I dig out the F10 casing. I'm guessing about 175 grams.
Adrian,
I think it would be as strong. You could put some epoxy in the nosecone, then add the sleeve and spin. The nice thing is that it keeps it all against the edges. You can go as thick as a mayo/peanut butter mixture and it will flatten when spinning. The other way to do it would be to put a little plain epoxy in the nosecone and spin to get all the surfaces coated. Then drop in a bunch of chopped fibers dry. Spin those, then add another layer of epoxy. You should look at the resins from Alumilite/their clones. Some of them are wicked strong.
Edward
If you do not have a lathe, you could use a drill press. Keeps it all vertical unless you have to turn it on it's side. I have used a drill press before for spinning things and if made strong enough, I have even carved nosecones on a drill press. Not as pretty or accurate as a lathe, but does seem to work in a pinch. My drill press has, if memory serve me, a #3 Jacobs chuck, so I can get up to and a bit over 1/2" diameter in the chuck.
Remember, if the ladies don't find you handsome, at least they will find you handy!
Wow, and that resin has 90 second pot life, with 5-8 minute demold time. If you work out the spinning, you could crank out 10 cones in an afternoon with that stuff.
If you do not have a lathe, you could use a drill press. Keeps it all vertical unless you have to turn it on it's side. I have used a drill press before for spinning things and if made strong enough, I have even carved nosecones on a drill press. Not as pretty or accurate as a lathe, but does seem to work in a pinch. My drill press has, if memory serve me, a #3 Jacobs chuck, so I can get up to and a bit over 1/2" diameter in the chuck.
Remember, if the ladies don't find you handsome, at least they will find you handy!
I don't have a drill press either, believe it or not. I just use a bench-mounted belt sander and a hand drill to make pretty much everything.
That is amazing! I just hope I can get that good in the future.
Remember, if the women don't find you handsome, at least they will find you handy!
Latest Post: Hello World Our newest member: everettelist43 Recent Posts Unread Posts
