
Conway,
I in the same position as Warren. I started with Dupont and have stuck to it.
One reason is that the people at the local shop have been very helpful and supportive. I suppose it's similar to your comment "it's the people not the paint" - just in this case it is sales people not chemists.
I also have a fair amount investesd in all the basecoats, reducers, and activators. I suppose I will make a change to one of the others but will need to use up some of what I have.
Finally, I am not a good enough painter to be able to detect the subtle differences in the paints. It's like many things in that you don't need the "best of the best" until you really know how to use it.
I also want to make a comment about vinly graphics. There are a couple of guys that support the model rocket hobby and advertise in the magazines. I like to support them.
Well Ken, I was just looking at your bird last night and I wanted to say that it is a very well crafted rocket. I can tell that a lot of thought and time went into it. Excellent work Ken! It will look good in whatever color you want on it.
As for everyone else… If you have a rocket that you particularly like and want to see it with something more then a rattle can finish. I would be happy to work something out; I am always willing to trade paintwork for propellant!
Art
Thanks for the compliments, Art. When I was building Estes rockets in the late '70s/early 80's, I must have thrown together 40-50 of them, but I'd be embarassed to show them to anyone today. Now I don't have the time or room for a huge fleet, so I put a lot of thought, time, and yes $ into one. I can do L1, play with DD, clusters, payloads, data collection, and airstarts (though optimized for none) with 1 bird. It's only the third rocket I've built for more than C power (not counting my son's Blue Ninja). I kinda skipped over the G and H motors... maybe later.
I'm stopping by the paint shop this afternoon. I'll probably be calling you with questions on it.
Thanks,
-Ken
There's nothing wrong with Rattle Can paint jobs. Some of the best art work and social commentary gets painted that way these days. Of course, there's a lot of garbage spewed from a can as well. It's all a matter of prespective. And from the ground upwards, they all look good when they fly straight or not.
My first Estes rockets when I was 10 or so had the best paint jobs of all using Testors brush-on paint. Wish I still had those rockets.
Art, you have a P.M.
-Ken
Oh, yah. Stay away from that glazing putty or spot putty crap! I try to not use anything that doesn't use an activator mainly because some products that don't use an activator to initiate a chemical reaction will shrink over time or trap moisture under the paint, which in time will allow the paint to chip off or lift.
I recommend a product called "Metal Glaze" or "Blaze Glaze". It is basically just a thinner form of Bondo that can be easily mixed and spread onto a surface. It is really good for filling shallow imperfections, pinholes in glass or carbon. It is also used to fill low spots in order to straighten a surface. If you are filling deeper and more involved imperfections then straight up Bondo will do the job. Most Napa stores and auto body supply shops carry the glaze.
Art
Hi Art, it's been a while,
Since you've become the resident "paint guy" I had a question. I'm back in Rocketry after a few years off .. since the Titan basically, and am glassing up a big'un. In the past, the glass goes great and I add a faring coat on top, which goes on awesome, but when it dries it has lots of tiny pinholes .. thousands! The primer fills them ok, but I'll never get that awesome look some of you do .. any ideas? 🙂
I'll check out this "Glaze" but I've got 8' of 12" tube and thousands of pinholes. I need to learn how to avoid them in the first place ... if possible.
You can see what I'm up to at www.smashrocketry.com. I'm flying this project, the DragonShip 7, as well as my L3, the Bruiser, and my 2-stage Assassin in Sept at Orangeburg, SC. So I've got a lot of sanding and painting to do.
Thanks,
Steve Mashburn
Woodstock, GA
Steve, Welcome back!! Try my Glassing method. It gets rid of about 90 percent or more of the pinholes. The Blaze glaze is what I recommend to fill the ones you have or any others left over. Its basically a light weight finishing filler like bondo but different.
Conway
Steve, Welcome back!! Try my Glassing method. It gets rid of about 90 percent or more of the pinholes. The Blaze glaze is what I recommend to fill the ones you have or any others left over. Its basically a light weight finishing filler like bondo but different.
Conway
Thanks, I'm sure you understand the "stepping away" for a bit. When I was there a few years ago you were the "missing guy" .. 🙂
As to your Glassing Method, I'm not sure what you are saying. Is Blaze what gets rid of the 90%, or is there a glassing method posted elsewhere you wanted me to see? I would definatly appreciate the tips, and will p/u some Blaze for my touch up work on the other "finished" projects.
Also, to all as well, do you apply a faring coat after glassing? how much sanding do you do before the faring? how thick can you make the faring? I ask this because I need to add faring to my nosecone, and because of it's shape I may not have the same effect/benefit spinning it on the rocket rotisserie (sp?). Can you make it super think and basically "trowel" it on?
I welcome any tips!
Thanks,
Steve
Yup thats right I was the Missing guy when you were here. After a 3.5 year off time Im back.. Scary huh. LOL
Anyhow my glassing method is what takes care of the nice finish and lack of the majority of pinholes you have in glass. Its less expensive then Vacuum bagging and works well to remove excess epoxy as well as make a strong nice finished tube. Here is a post on how I used it on a coupler of my Nose cone from my L3 build thread at TRF. Also some pictures of the process as well as a body tube my daughter did for one of her Rockets. James Russell and Dave Hanson have used this method on Daves body tubes for his 6" diameter Talon for his L3 and he even sent the tubes back to be slotted and cut by Giant Leap's Kent Burrnett and he loved them alot.
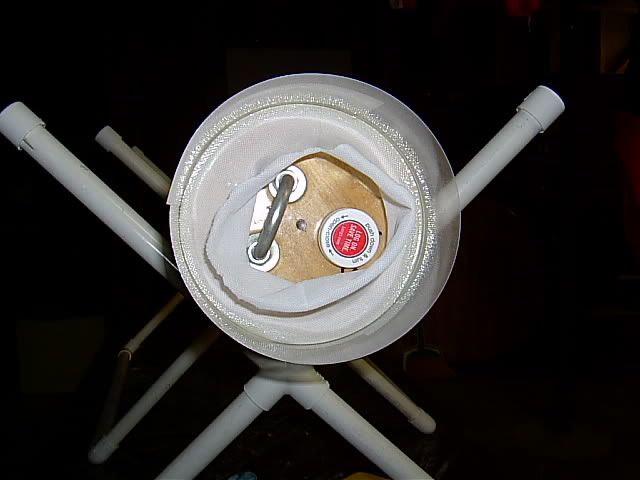
I had to get a replacement nosecone from PR as the one I got was cracked in shipping so badly that it was split up the side. Anyhow. I got the nosecone all ready and found that 1 it fits sloppy in the body tube. so first I need to fix that. Some people opt to just use some masking tape to snug things up. I prefer a more permanent solution.
I will glass the coupler piece of the cone.
So first lets put on the sock. Now I normally dont use this particular brand but i had a small piece at hand and used it. this is the sleaving from Giant Leap. and its not glass but nylon. Its normally designed for 3 to 4 inch rockets but I will strecah it around the end and it works fine. Normally if im not using actual fiberglass cloth I will use Areosleave. BTW I do recomend them highly.
So here are some pics
The sock material in place
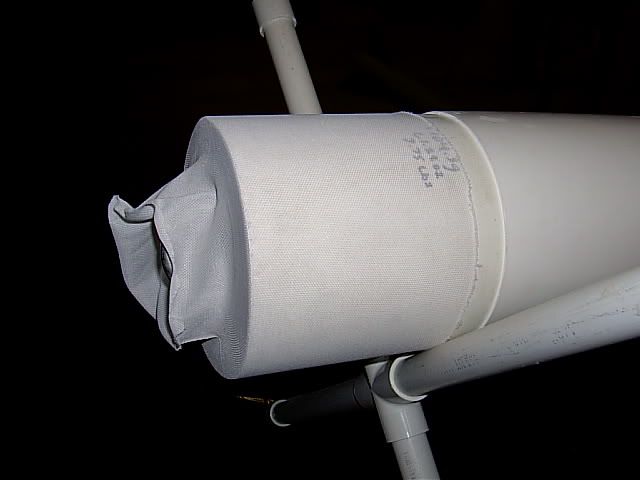
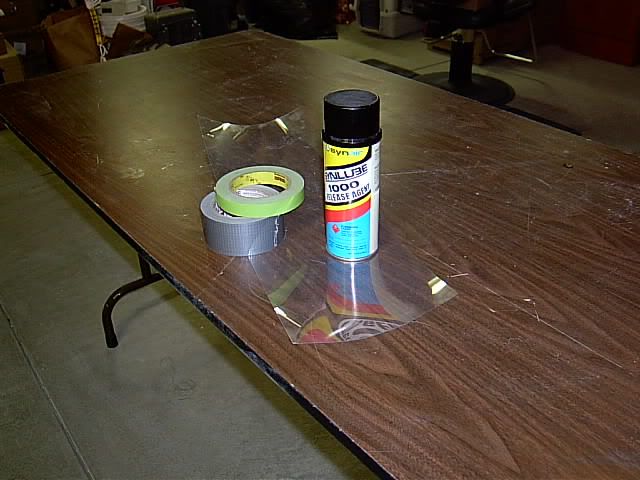
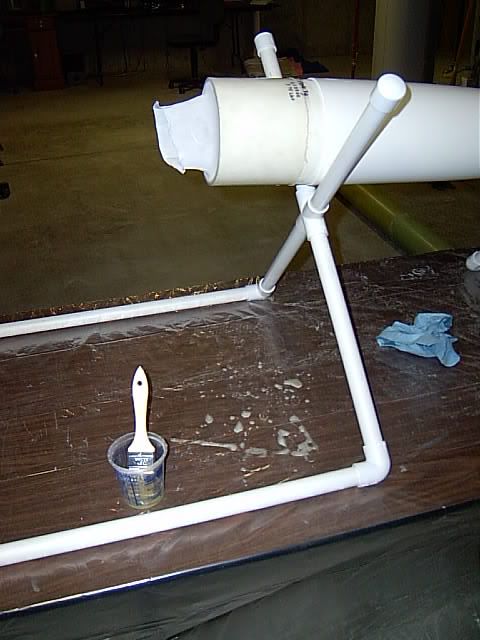
A trick I prefer to do when I laminate or make parts is to use Mylar and release agent and do a compression wrap..
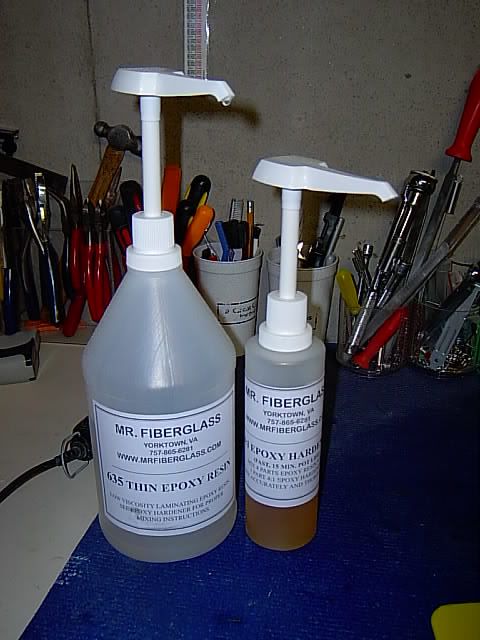
I have also recently decided to try an epoxy that came highly recomended to me but yet a little bit less expensive. Several have tod me its the same in quality as West systems But its made and bottled for Dave "Mr Fiberglass" Works great same specs as strength and heat as West systems. Half gallon kit with pumps was less then 40 bucks shipped I belive. Works great!!!
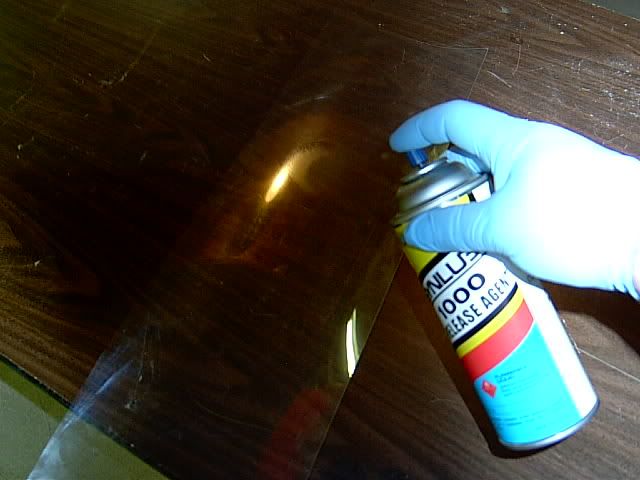
Even though Mylar is a release I will spray it down a little further just to aid it.
This relase spray works great..
The mix ratio is 4:1. Works well. This is the fast and it gives a 15 to 20 min pot life then will dry completely after spread out up to 24 hours.
Brushed on the epoxy
All wetted out with squegee and brush.
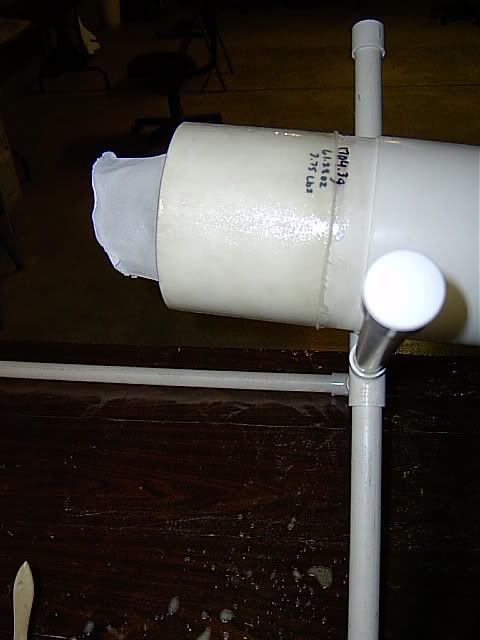
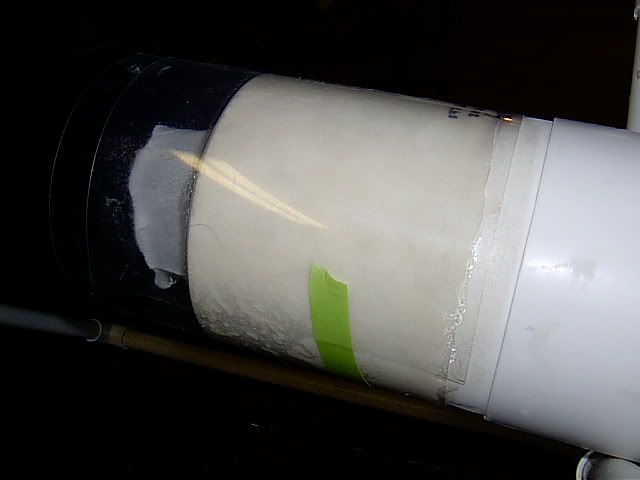
Then I will take the mylar and wrap the piece we are working on and use the masking tape to secure it in place.
Then using duct tape I will spiral wrap it from top to bottom to make a nice tight compression bandage.
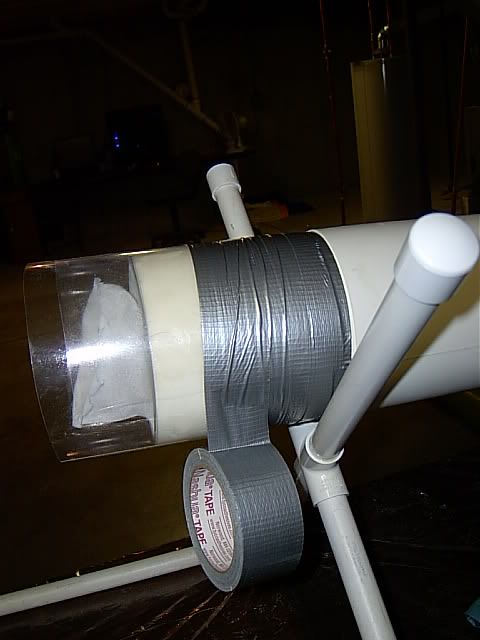
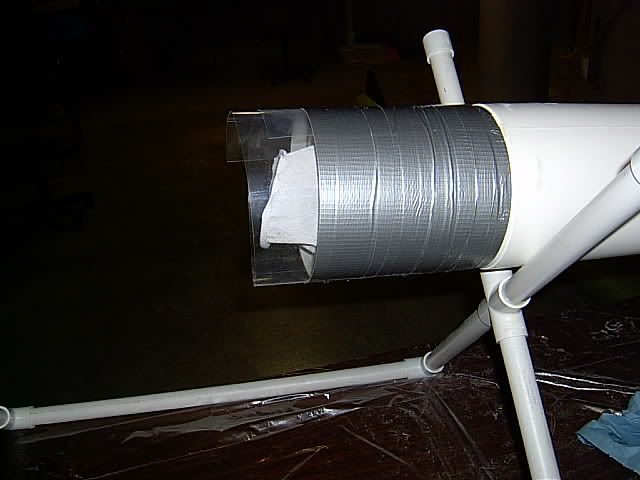
Now then we will let it sit and cure. whe its all done nice finish and it removes some of the epoxy..
I will update how it goes after it cures as well.
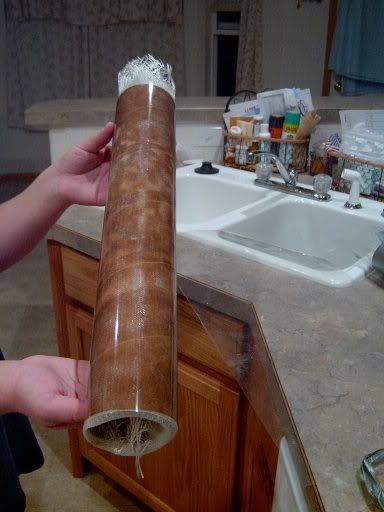
Here is a pic my 14 year old daughter did of here glassed 3" BSD Thor airframe. she did it all herself and used the areosleave. And this methoud of the mylar and compression wrap.
I then use the body filler (the Blaze glaze finishing compound) smooth it into the remaining pin holes and then let it cure and sand to a fin finish. It wont take much. In cases like yours right now I would recommend using the blaze glaze and smooth it over and cover the pin holes and then sand it down nice. you may have to repeat the process to get them all nice. One thing I did leave out in my laminate was a layer or two of 2oz cloth around the outside of the 6oz cloth as its a fine weave and makes for a better outer finish with less pitting. Compress it all and let it cure and there ya go.
I then use the body filler (the Blaze glaze finishing compound) smooth it into the remaining pin holes and then let it cure and sand to a fin finish. It wont take much. In cases like yours right now I would recommend using the blaze glaze and smooth it over and cover the pin holes and then sand it down nice. you may have to repeat the process to get them all nice. One thing I did leave out in my laminate was a layer or two of 2oz cloth around the outside of the 6oz cloth as its a fine weave and makes for a better outer finish with less pitting. Compress it all and let it cure and there ya go.
Cool, thanks. However, that process may be a bit more intense with 12" tubes and a 10' rocket. Just the quantity of mylar and duct tape might make it cost in-effective. btw, speaking of cost, I use Mr Fiberglass too, and had no problems at all ... other than the pinholes but I got them with West as well. I do get the Amine Blush sometimes if I don't clean the surface before applying the faring coat. Of course I'm also working in 90deg temps with 60% humidity, and it's raining outside right now .. so up that a bit. I'll put an AC in my shop one of these days, they're less that $100 for a good window unit.
I used a 7.5oz and then a 4oz to provide a better surface, much better than the 2 layers of 6oz I used to do.
I'll see if I can incorporate any of that into my process.
Thanks,
Steve
Since you've become the resident "paint guy" I had a question. I'm back in Rocketry after a few years off .. since the Titan basically, and am glassing up a big'un.
Art painted my L3 which survived a substantial drag across the prairie. But, realize that Conway mixed the paint. Anything either one of these guys says is gold. Try Aeropoxy from Giant Leap; I never had bubbles. Though PM Art about that. 😉
Latest Post: Hello World Our newest member: lawrencebmu435 Recent Posts Unread Posts
